
More and more people, and businesses, today are starting websites. Whether we are talking about an already established business, a sports league, e-commerce, or a new blogger, the continuing, rapid growth of businesses online cannot be ignored. In this post you will learn how to start a website with Bluehost.
You may be asking yourself, “but how do I start a website?”. If you are new to the online world, you may feel overwhelmed with the amount of information out there.
To keep things simple, I will cover 4 basic steps on how to start a website with Bluehost, using WordPress.
- Buy a Domain Name
- Choose a Web Hosting Provider & Setting up your hosting account
- Install WordPress
- Build Content
Step 1: Buying a Domain Name
Have you purchased a domain name for your website or blog already? If not, then the hardest part is picking a domain name that best suits your business or blog. Once you decide on a domain name and it’s available for purchase, the next step is to buy it!
Due to my prior experience using NameCheap for purchases, I recommend using NameCheap to purchase your domain name(s). Some people may be looking for an all-in-one package. Therefore, you can also purchase your domain name(s) through Bluehost. Bluehost provides more detailed steps on their website for purchasing your domain, and setting up your hosting account all at once.
If you are having trouble deciding on a domain name for your blog or business, then NameCheap has a Domain Name Search tool that you can use for free. Therefore, It is extremely helpful and they provide the pricing in the results page also.

Step 2: Choosing a Web Host
You might be thinking, “Well, I can just start on Blogger, or one of the free hosting services, for a little cheaper and learn how to do everything that way”. PLEASE… Don’t do that! In addition, there are many reasons for why using any of the free services, is a really bad idea. I recommend using a reputable web hosting service, and to start a website with Bluehost.
If you will be turning your website into a business, making money off of your website, or if you are interested in ever making money off your blog, or freelancing, then paying for your web hosting is a MUST. It’s extremely cost competitive as well to go through Bluehost.
You can run any of your own advertisements, affiliate links, direct advertising, etc. with a website or blog hosted on Bluehost. It is very difficult to make money on Blogger, or any other free blogging platform. In many cases it never happens.
Many advertisers and companies tend to run away from these free websites because they don’t view them as professional as self-hosted websites or WordPress blogs. Therefore, that is another big reason to use a reputable company like Bluehost.
Reasons For Choosing Bluehost
There are many reasons for why you may want to choose Bluehost for your website or WordPress blog. I honestly believe they are one of the best web hosting providers out there. My reasons for believing this include:
- It is easy to use. Bluehost makes it very easy to create a website or WordPress blog. Their customer service is excellent, and their website offers excellent information.
- Over 2 million websites worldwide are being powered by Bluehost every day.
- Bluehost has a fast page loading speed, and 99.9% uptime!
- WordPress lists Bluehost as one of only 3 hosting providers they recommend (WordPress.org).
- Bluehost web hosting offers great technical support.
- It is extremely affordable to use Bluehost, and they offer cheap web hosting. Therefore, you can have a website or blog of your own, and the only real expense you need to pay is the cheap blog hosting which starts at a low price of just $3.95 per month for a 36 month term.
- You can get a FREE website domain (for 1 year with purchase of 12 months of hosting), if you want to do the all-in-one package. If not, then you can bring over your own domains for FREE.
- WordPress through Bluehost is FREE.
- Your website or blog will be self-hosted. If you want to monetize your blog, then you will want to be self-hosted.
- You will appear much more professional to readers, companies, and so on, if you are self-hosted on Bluehost.
- Bluehost offers a 30-day, money back guarantee! Therefore, if you decide that Bluehost is not a good fit, you can be reimbursed.
Get started now with Bluehost!

Step 3: Install WordPress
This may seem like a complicated step, but Bluehost makes this one of the easiest things for you to do.
After creating your username and password, Bluehost will guide you through exactly what you need to do in order to start a website/blog. First, Bluehost will ask you to pick a theme. You can just pick a random one here or find one that you actually like. There are many FREE themes to choose from, and you can also choose the paid versions.
You can change your theme later, so it’s not a big deal. In addition, you can scroll to the bottom and click on “skip this step”.
Click on “Start Building”. On the next screen, you can choose between “Business” or “Personal”. That decision is up to you! In addition, you can click the “I don’t need help.” GREAT! You now have a website/blog.
MOJO Marketplace
Another way to install WordPress through Bluehost, is by using the new MOJO Marketplace for installing WordPress and other applications. In your cPanel, find the section titled “MOJO Marketplace” and choose the “One-Click Installs” button. This will take you to a page within the MOJO Marketplace called “Scripts and Platforms”. The blog section is at the very top, so all you have to do here is click on the WordPress icon.
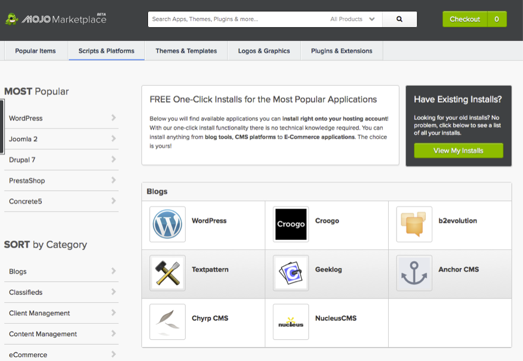
This will open the installation window. Click on the green “Start” button that will start the WordPress installation process, which has a few easy steps.
Step 1: Choose where you want to install WordPress. This can be any domain on your account, or a subdomain or a folder for one of your domains. Next, click on “Check Domain,” which will make sure the domain is assigned and pointing to your account. You may get a warning that you are overwriting files, but as long as you don’t have another website built yet, you can check the box and continue. This is mostly to make sure that you really want to install it in that location. If you do have other sites built, then you will want to make sure you’re not overwriting something important.
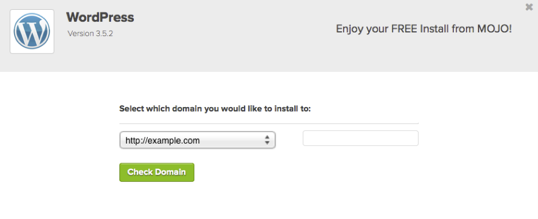
Check Your Domain
Step 2: Show Advanced Options. This section allows you to set up your own username and password for your WordPress install. IT is recommended to use a different username than “admin” and a very strong password. Make sure that the “Automatically create a new database for this installation” box is checked unless you have a database already set up that you want to use.
Step 3: After you’ve read the terms and conditions, check the box indicating that you’ve done so, then click “Install Now.”
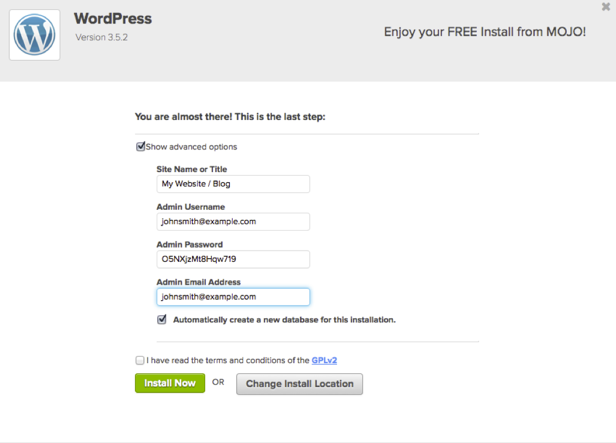
Install WordPress
Now you’ll see the progress page, which will show you how far along the installation is. Once WordPress is fully installed, it will provide you with your site URL, the admin login URL, your username, and password. You will get a copy of this information, except your password, in your email as well. Make sure to keep it in a safe place.
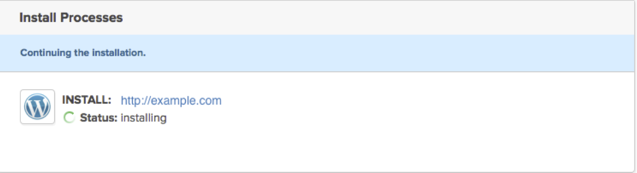
WordPress Install Progress Bar
Now you can log into your WordPress site by going to the admin login URL. Enter your username and password, then click “Log In.” This will take you to your WordPress dashboard.
Step 4: Build Your Content
Now that your website/blog is up and running on Bluehost, it is time to start building your content. The WordPress Dashboard, along with the toolbar on the left side of the screen, provides you with all of the tools to start creating great content. If you need help, then there is a “Help” tab at the top of the screen, on the right.
Now What?
Congratulations! You now have successfully learned how to start a website with Bluehost! That didn’t take long, did it? Now you can design your site using the various templates and plugins.
You have the ability to control everything you do with your WordPress site, such as creating pages, writing blog posts, and changing the appearance. Go ahead and start building your content for your new website or blog. Don’t be afraid to experiment, and let your creativity shine!
Share this post and follow us on social media!